TREK Attaching Medallion Instructions
Below are some instructions on how to attach your medallions to your hiking stick. You can do it!
- Find a spot on your stick where you want the medallion to go.
- Remember to leave room for your hand on the stick if you plan to use it as a hiking stick!
- Use a vise to hold the stick in place so it doesn’t roll around.
- If you don’t have a vise, use something like a towel to keep it in place.
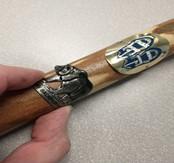
- Place your shield where you want it on your stick.
Bend the shield to it fit well on that area of the stick.
- Start with the bottom/middle hole and pre drill the hole. You can skip the drilling steps below, but drilling makes it easier.
- Use a drill bit that is about the same width as the hole/nail.
- Only drill down about half of the length of the nail.
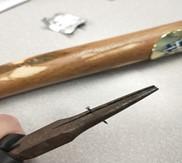
- Each medallion comes in a bag with one extra nail, so if you bend one, you have an extra.
Make sure the nail is straight and you point it straight down. Hammer in the nail, SLOWLY! It works well to hold the nail with needle nose pliers to prevent it from bending or prevent yourself from hammering your fingers.
- Do this with the other nail(s). Some medallions have two holes and some have three.
- Make sure to check that the medallion is lined up how you want it before you put the second nail in.
- Check out this video from Summit Metroparks for more tips.