How to Add Captions to a Video Using Kaltura Reach
Kaltura Reach allows instructors to generate and edit captions for videos stored in Kaltura.
Note: Captions are auto-generated and can be reviewed and edited for accuracy before they are used in a course.
This guide will walk you through adding and editing captions to videos using Kaltura Reach.
Step 1: Log in to Kaltura
- Go to the Kaltura Homepage
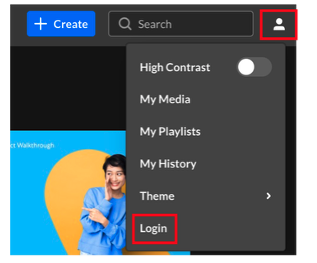
- Click on the User Menu in the top right corner and log in using your Kent State credentials
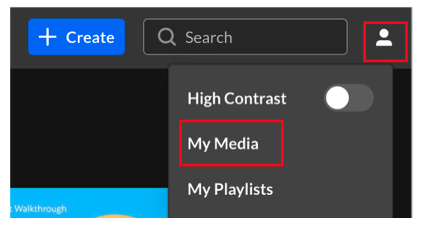
- Select My Media from the navigation menu
- Review the list and click on the name of the video you want to caption
Step 2: Request Captions Using Kaltura Reach
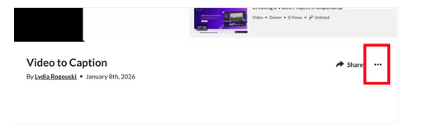
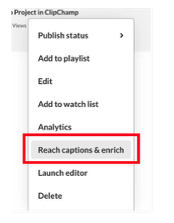
- On the video page, expand the 3-dot ellipsis menu beneath the video
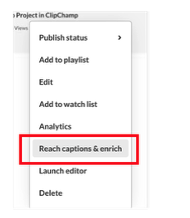
- Select the Reach captions & enrich option
- Review the settings, adjust if needed for language, etc., and click Order

Captions will be generated automatically, and you will receive an email notification when they are complete. Processing time varies depending on video length. Please submit a Help Desk Ticket to request automated captions for multiple videos.
Step 3: Edit Captions for Accuracy
Auto-generated captions are a starting point to create accurate captions for your video.
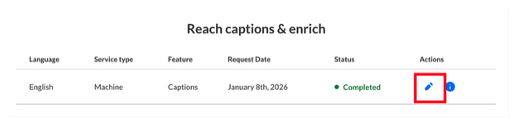
- Return to the Reach captions & enrich option from the menu beneath the video
- Under Actions, click the pencil icon to Edit Captions
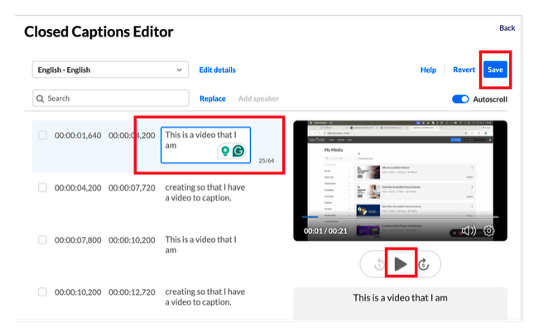
- In the Closed Captions Editor, play the video while reviewing the captions
- Correct misspelled words, names, technical terms, acronyms, timing, or punctuation
- Save your changes
Step 4. Confirm Captions Are Published
After editing, verify that captions are published and visible, and ensure students can turn captions on and off during playback.
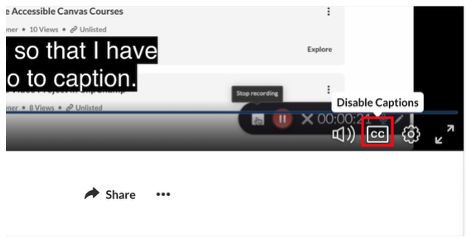
- Return to the video.
- Play the video and locate the CC button in the bottom menu. Click to enable or disable.
Tips for Better Caption Accuracy
- Script or outline videos before recording
- Speak clearly and avoid background noise
- Use consistent terminology
- Review captions before the course begins, when possible