
Checkboxes

To create checkboxes in the Admissions Theme such as the ones shown above, follow these directions:
- Go to the page where you want to add the checkboxes.
- Click on the Edit button (located under “Open Utilities” in view mode).
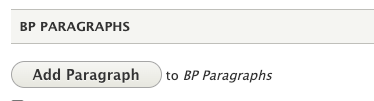
Scroll to the BP Paragraphs and select Add Paragraph.
- The Add Paragraph window will open.
- Select Blank WYSIWYG from the list.
In the Blank WYSIWYG, choose Full HTML.

- Create an unordered list of items (bullet points).
In the Styles dropdown menu, choose “Block Grid.” There are multiple types to choose from.

- For light checkboxes, click on the Source tab and paste the following code: <ul class="large-block-grid-2 medium-block-grid-2 small-block-grid-1 right-aligned-check check-light">
- For dark checkboxes, click on the Source tab and paste the following code: <ul class="large-block-grid-2 medium-block-grid-2 small-block-grid-1 right-aligned-check check-dark">
- Then, add the following style HTML code within the editor, above or beneath the content:
<style>
.right-aligned-check li::before {
width: 32px;
display: inline-block;
float: left;
margin-right: 1.25rem;
margin-top: 8px;
}
.check-dark li::before {
content: url(https://www-s3-live.kent.edu/s3fs-root/s3fs-public/Icon_Checkmark%20sma…);
}
.check-light li::before {
content: url(https://www-s3-live.kent.edu/s3fs-root/s3fs-public/Icon_Checkmark%20sma…);
}
</style>
