How can I make a good recording for class or auditions at home using my smartphone?
Suggested recording apps (audio only):
- Android: RecForge II (free)
- Apple: Voice Record Pro (free)
Please use the following settings in the app:
- 44.1kHz of sampling rate / 16-bit
- Mono recording, with front microphone selected
(If you’ve just installed one of these apps, these should be the default settings.)
Prep your recording environment
- Quiet room: no fan (even computer fans) or heat noise. Shut your doors. Everyone out of the room (including pets!)
- Minimize reflective surfaces: Use rugs on floors, pull your curtains if you have any. As much as possible, try to cover any large, hard surface to diminish echo with blankets, pillows, comforters, etc.
- Place yourself somewhere in the center of the room. Avoid facing a wall directly, instead, rotate so you address it at a 45-degree angle.
Phone placement
You’ll need to find a way to secure the phone, preferably without setting it in the middle of a hard, large surface, such as a desk. A spare music stand or a stool should work. You can also add a piece of fabric between the phone and the supporting surface, but make sure not to muffle the microphone.
Vocal students: Do not hold the phone, it will introduce too much noise.
Address
Aim the front microphone (bottom of phone) directly toward the sound source.
Distance
Built-in microphones in most smartphones are not the greatest for music capture. You have to get the sound source fairly close to get a decent signal. Depending on your instrument, experiment from 20 inches for the quieter instruments, to 48 inches for the louder ones.
Test, and control
Because of the hardware differences from phone to phone, and the difference of dynamics in instruments, it is hard to establish guidelines that will fit all cases.
Take the time to control the audio quality before you get carried away. Record a section, preferably a loud one, and listen back. Use headphones or external speakers instead of the phone’s built-in speakers.
Once you start recording, you will be able to monitor the sound waves right on the screen. This can also be a tool to use to adjust the distance: If the sound wave looks like a solid block (fig. 1), increase the distance, and stop once you start seeing some “air” in the sound signal (fig. 2). If the signal looks too weak (fig. 3), reduce the distance.
Fig. 1:Signal too hot/close
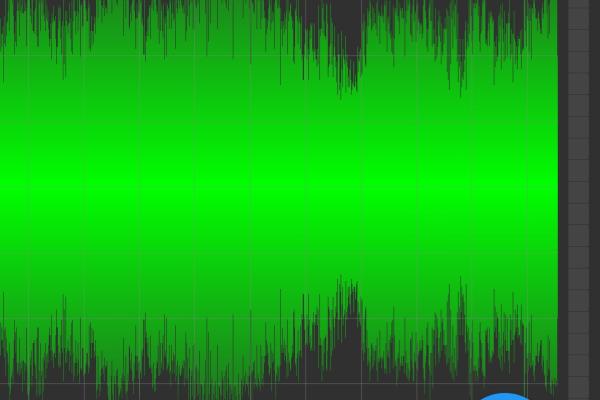
Fig. 2: Optimal
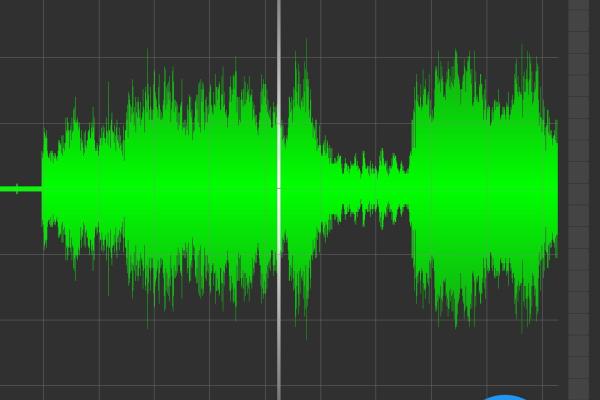
Fig. 3: Signal too weak/far

Capture
Both apps are very self-explanatory, and will autosave your audio file as soon as you stop the recording.
Label
By default, apps like RecForge II will name a file based on its date and time of creation. You might want to rename the file so it is easily recognizable.
Back-up
Take the time to back up your files regularly. Using cloud-based storage like Google Drive will also make it easier to share those files later on.
Questions and support:
Sam Robert, Recording Arts Technician
srobert@kent.edu| (330) 718-8784